2022 has been an incredible year for Microsoft Azure as the company released several game-changing services and feature upgrades. Let’s take a walk through some major launches that transformed capabilities for cloud computing.
1. Azure Container Apps
A fully managed serverless container service introducing:
Key Features:
Scale based on HTTP traffic, events, or KEDA scalers
2022 was a transformative year for Azure, with significant advancements across compute, storage, networking, and security. These new features and services demonstrate Microsoft’s commitment to innovation while maintaining enterprise-grade reliability and security. Organisations should carefully analyze these new services and features in order to get a good leverage from their cloud strategy. Always keep yourself updated with the best practices and latest documentation of Azure as these services are constantly being evolved. Always keep in mind that cloud services change really fast. One has to periodically check his implementations for updates regarding Azure features and improvements in functionality that could be useful and leverage new things available on it.
2022 was a transformative year for AWS, with many significant launches and feature enhancements. Let’s dive into the most impactful AWS services and features that were introduced during this period.
1. Amazon Inspector for Container Images
AWS significantly expanded its security capabilities with the launch of Amazon Inspector support for container images. This brought in the following features:
Automated vulnerability scanning for container images
Integration with Amazon ECR
Continuous monitoring and assessment
Detailed severity scoring and remediation guidance
2. AWS Private 5G A revolutionary service that allows enterprises to deploy and manage their own private 5G networks:
Key Features:
Simplified deployment of private mobile networks
Pay-as-you-go pricing model
Automated network management
Integration with AWS services
Enterprise-grade security
3. Amazon SageMaker Canvas A major step forward in no-code machine learning: Capabilities:
Capabilities:
Business insights generation without coding
Visual interface for building ML models
Quick data import and preparation
Automated model building
Integration with existing SageMaker workflows
4. AWS Lake Formation Cross-Account Access
Enhanced data lake management with:
Simplified cross-account access
Centralized permission management
Fine-grained access controls
Automated data discovery
Enhanced security compliance
5. Amazon CloudWatch RUM (Real-User Monitoring) A major addition to application monitoring:
Features:
Real-time user experience monitoring
Client-side performance tracking
User behavior analytics
Error tracking and debugging
Custom metric creation
6. AWS Amplify Studio
A visual development environment for creating full-stack applications:
Capabilities:
Visual UI development
Ready-to-use components
Backend integration
Data binding
CI/CD pipeline integration
7. Amazon FSx for OpenZFS
A new file system offering:
Fully managed OpenZFS file systems
High performance
Cost-effective storage
Native ZFS features
Snapshot capabilities
8. AWS IoT TwinMaker
Digital twin creation service featuring:
3D visualization
Real-time data integration
Scalable modeling
Device connectivity
Analytics integration
9. Amazon CodeCatalyst
A unified software development service:
Key Features:
Project blueprints
Automated CI/CD
Issue tracking
Source code management
Development environment management
10. AWS Clean Rooms
A collaborative data analysis service:
Secure data collaboration
Privacy controls
Customizable analysis
Query controls
Audit logging
Technical Deep Dive: Amazon EKS Anywhere Updates
One of the biggest technical improvements was in EKS Anywhere:
AWS significantly improved its security offerings:
AWS IAM Identity Center
Single sign-on management
Fine-grained permissions
Multi-account access
AWS Certificate Manager improvements
Automated certificate renewal
Private certificate authority
Regional expansion
Cost Optimization Features
New tools for managing AWS costs:
AWS Cost Categories
Custom categorization
Automated tag mapping
Cost allocation
AWS Savings Plans enhancements
More service coverage
Flexible commitment options
Enhanced reporting
Best Practices and Implementation Guidelines
When adopting these new features:
Start with a pilot project
Document configuration changes
Train team members
Monitor performance metrics
Implement proper security controls
Impact on Different Industries
Financial Services
Enhanced security features
Improved compliance tools
Better data analytics capabilities
Healthcare
HIPAA-compliant services
Enhanced data protection
Improved patient data management
Retail
Better customer analytics
Enhanced scalability
Improved inventory management
Looking Forward
These 2022 features laid the groundwork for:
Enhanced AI/ML capabilities
Improved hybrid cloud solutions
Better security and compliance
More cost-effective operations
Simplified management interfaces
Conclusion
2022 has been an innovation-heavy year for AWS, from new services to features that have advanced the use of the cloud in security, machine learning, IoT, and application development. In all, these extensions have made AWS more powerful, more flexible, and easier to use for organizations of all sizes. The features announced in 2022 show AWS’s passion for innovation that also ensures security, scalability, and ease of use. Organizations intent on modernizing their infrastructure have to carefully take note of these newly released services and features for some possible benefits it could bring their operations. Remember to keep yourself updated with AWS documentation and best practices since these services are in continuous evolution, and new features are added regularly.
2021 saw GitOps emerge as a leading practice for Kubernetes deployments, with ArgoCD becoming the de facto tool for implementation. Let’s explore how to implement GitOps effectively using ArgoCD in Kubernetes.
What is GitOps?
GitOps is a declarative approach to Kubernetes cluster management and application delivery where:
Conclusion GitOps with ArgoCD in 2021 marked a radical shift in organizations’ way of handling their Kubernetes deployments. The key takeaways include:
Improved security through declarative configuration
Better auditing and compliance
Automated drift detection and correction
Simplified rollback procedures
Enhanced collaboration through Git workflows
For organizations looking to implement GitOps:
Start with a simple application
Gradually expand to more complex scenarios
Implement proper security measures
Set up comprehensive monitoring
Train teams on GitOps practices
The future of Kubernetes deployments is increasingly GitOps-driven, and the tooling and best practices will be led by ArgoCD.
2021 was an important year for cloud computing, with major developments across AWS, Azure, and GCP. Let’s dive into the key features and compare where each provider excelled.
Service Leadership by Provider
AWS Leadership Areas
Container Services
Amazon ECS and EKS showed maturity in:
Advanced scalability features
Deeper integration with AWS services
Enhanced security controls
Cost optimization capabilities
Serverless Computing
AWS Lambda remained dominant due to:
Advanced cold start improvements
Container image support
Enhanced debugging capabilities
Extension of maximum runtime
Database Services
-- Amazon Aurora improvements
CREATE DATABASE my_database
WITH GLOBAL TABLES
ENABLED IN ('us-east-1', 'eu-west-1');
FeatureAWSAzureGCPRelationalAurora (Excellent)SQL DB (Good)Cloud SQL (Good)NoSQLDynamoDB (Excellent)Cosmos DB (Excellent)Bigtable (Good)Data WarehouseRedshift (Good)Synapse (Good)BigQuery (Excellent)
Cost Comparison
Virtual Machines
# Example cost comparison for general-purpose VMs (2021 pricing)
costs = {
    'AWS_t3.xlarge': '$0.1664 per hour',
    'Azure_D4s_v3': '$0.192 per hour',
    'GCP_n2-standard-4': '$0.1896 per hour'
}
Performance Benchmarks
Database Performance
Transaction Processing
AWS Aurora: 200,000 TPS
Azure SQL: 175,000 TPS
Google Cloud SQL: 160,000 TPS
Storage Performance
Object Storage Latency
AWS S3: 100-200ms
Azure Blob: 120-220ms
Google Cloud Storage: 110-210ms
Security Features
AWS Security Leadership
AWS Shield
Advanced DDoS protection
WAF integration
Real-time metrics
24/7 support
Azure Security Leadership
Azure Sentinel
SIEM capabilities
AI-powered analysis
Threat intelligence
Automated response
GCP Security Leadership
Cloud Armor
DDoS protection
WAF capabilities
Edge security
Global load balancing
Market Position 2021
Market Share
AWS: ~32%
Azure: ~20%
GCP: ~9%
Unique Differentiators
AWS
Broadest service portfolio
Most mature marketplace
Largest global infrastructure
Azure
Best hybrid cloud solutions
Strong enterprise integration
Comprehensive compliance offerings
GCP
Leading AI/ML capabilities
Superior data analytics
Advanced networking technologies
Recommendations by Use Case
Enterprise Applications
Recommendation: Azure
Reasons:
Strong enterprise integration
Comprehensive hybrid solutions
Familiar Microsoft ecosystem
Startups
Recommendation: AWS
Reasons:
Extensive free tier
Comprehensive documentation
Large community support
Data Analytics
Recommendation: GCP
Reasons:
Superior analytics tools
BigQuery capabilities
ML integration
Conclusion
2021 showed each cloud provider developing distinct strengths:
AWS: Maintained leadership in core infrastructure and serverless computing
Azure: Excelled in hybrid cloud and enterprise integration
GCP: Led in data analytics and machine learning
Organizations should:
Evaluate specific use case requirements
Consider multi-cloud strategies
Focus on cloud-native architectures
Monitor evolving service offerings
Plan for cost optimization
The cloud market matured further in 2021, with all the providers providing solutions for different use cases that are compelling. One needs to understand these differences to make informed decisions about cloud adoption and migration strategies. Remember that cloud services evolve rapidly, and regular re-evaluation of cloud strategies is essential for maintaining competitive advantage and cost efficiency.
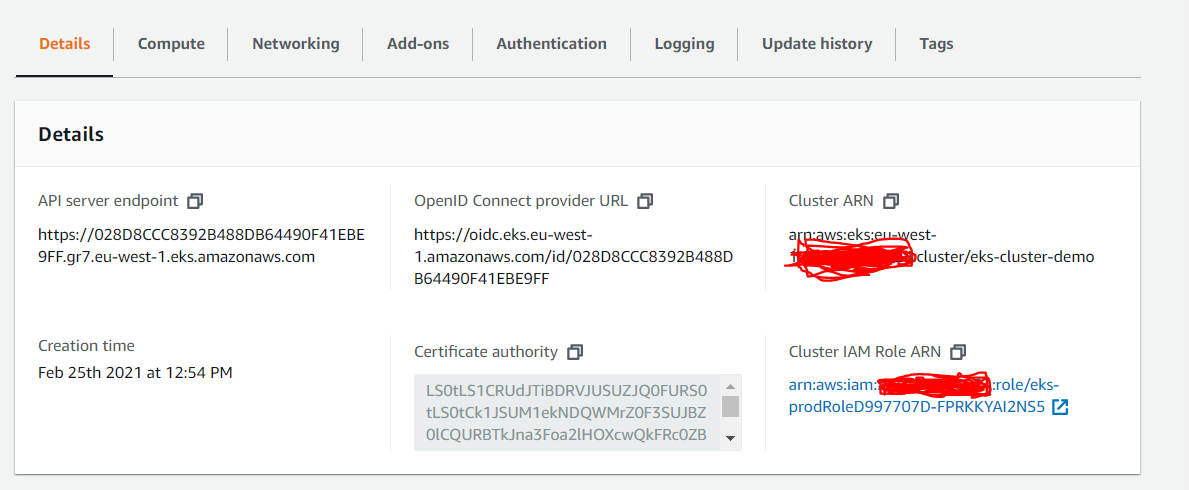
In my previous post, I have discussed about how to create vpc, subnets, internet gateway, nat gateway using AWS CDK(Python). In this post, we will be discussing about how to create EKS (k8s) cluster. This is requested by many of my followers, so I would like to write a blog to help the community.
Create a new stack called EKSStack and use existing vpc from other stack (vpc: ec2.Vpc)
In the above code, you can see that I’m using version 1.9, cluster will use private subnets and the IAM role that was created will be used. I used default_capacity = 0 since, I do not want EKS to create default node group. I will be creating node groups separately and will use SPOT instances for worker nodes in this case. This is all about control plane definition.
I’ve used multiple instance types for SPOT for different worker nodes. Disk size for the nodes to set to 50GB and two nodes will be created. you can adjust these parameters based on your requirement.
you need to update requirements.txt file to import modules for iam and eks. you can install these modules using pip install -r requirements.txt
aws-cdk.aws-iam
aws-cdk.aws-eks
now, let’s run cdk ls to see howmany stacks we can see. we should expect to see two stacks.
Now, let’s Synthesize an AWS CloudFormation template for the app, as follows.
(.venv) C:\Rama\MyProjects\mycdkproject>cdk synth
Successfully synthesized to C:\Rama\MyProjects\mycdkproject\cdk.out
Supply a stack id (mycdkproject, eks) to display its template.
Now, let’s deploy
cdk deploy eks --profile cdkprofile
if you have encountered an error as eks failed: Error: This stack uses assets, so the toolkit stack must be deployed to the environment (Run “cdk bootstrap aws://unknown-account/unknown-region”)
you can fix this by running cdk bootstrap aws://accountnumber/region
So far, i’ve discussed about how to configure vpc, subnets, natgateway, ec2 using terraform, in this post i’m going to discuss how to configure VPC, Subnets, Internet Gateway, NatGateway with AWS CDK using python as language. We don’t need to write any complex cloudformation scripts, we use AWS CDK to construct resources. For more information about AWS CDK, you may check here.
Pre-requisites:
You need to install aws cdk and python installed on your environment.
Once, you have aws cdk and python installed we can initialize new project. I’m using visual studio code in my example to create project, you can use any of your favorite IDE.
mkdir mycdkproject
cdk init --language python
The above will create a cdk structure with python as language. Activate your virtual environment source .env/bin/activate or python -m venv .venv depending on your OS (Linux/MaC/Windows). Once you initialized then the structure would look like this
We have cdk structure ready, let us start importing required modules (aws_ec2, aws_ssm, core)
edit the requirements.txt file (
aws-cdk.core aws-cdk.aws-ssm aws-cdk.aws-ec2) and install them using python install -r requirements.txt
This will ensure you have required modules to start with.
Let us modify the mycdkproject_stack.py.
from aws_cdk import (
     aws_ec2 as ec2,
     aws_ssm as ssm,
     core
)


class MycdkprojectStack(core.Stack):

    def __init__(self, scope: core.Construct, construct_id: str, **kwargs) -> None:
        super().__init__(scope, construct_id, **kwargs)

        # The code that defines your stack goes here
        env_name = self.node.try_get_context("env")

        self.vpc = ec2.Vpc(self, 'demovpc',
            cidr = '192.168.50.0/24',
            max_azs = 2,
            enable_dns_hostnames = True,
            enable_dns_support = True,
            subnet_configuration=[
                ec2.SubnetConfiguration(
                    name = 'Public-Subent',
                    subnet_type = ec2.SubnetType.PUBLIC,
                    cidr_mask = 26
                ),
                ec2.SubnetConfiguration(
                    name = 'Private-Subnet',
                    subnet_type = ec2.SubnetType.PRIVATE,
                    cidr_mask = 26
                )
            ],
            nat_gateways = 1,

        )
        priv_subnets = [subnet.subnet_id for subnet in self.vpc.private_subnets]

        count = 1
        for psub in priv_subnets:
            ssm.StringParameter(self, 'private-subnet-'+ str(count),
                string_value = psub,
                parameter_name = '/'+env_name+'/private-subnet-'+str(count)
                )
            count += 1
The above script will create vpc, public, private subnets and nategateway.
Call this stack into your app.py as below
#!/usr/bin/env python3

from aws_cdk import core

from mycdkproject.mycdkproject_stack import MycdkprojectStack

app = core.App()
MycdkprojectStack(app, "mycdkproject")

app.synth()
let us run cdk ls to see if there any list of stacks
cdk ls
Synthesize an AWS CloudFormation template for the app, as follows.
cdk synth
If your app contained more than one stack, you’d need to specify which stack(s) to synthesize. But since it only contains one, the Toolkit knows you must mean that one.
The cdk synth command executes your app, which causes the resources defined in it to be translated to an AWS CloudFormation template. The displayed output of cdk synth is a YAML-format template; our app’s output is shown below. The template is also saved in the cdk.out directory in JSON format.
Oh, well how simple is that? Very minimal code and you don’t need to write large cloud formation templates. This is just a sample example, i’m going to upload full project in my github repository (https://github.com/sankar276/awscdkpython)
Please note that this is just a demonstration of how to create EC2 and ALB using terraform and i’ve not created certificate for alb example here. You can create ssl cert and attach it to alb.
Now, let us do terraform plan
terraform plan
provider.aws.region
The region where AWS operations will take place. Examples
are us-east-1, us-west-2, etc.
Enter a value: eu-west-1
Refreshing Terraform state in-memory prior to plan...
The refreshed state will be used to calculate this plan, but will not be
persisted to local or remote state storage.
data.template_file.s3_ec2_policy: Refreshing state...
data.aws_availability_zones.azs: Refreshing state...
------------------------------------------------------------------------
An execution plan has been generated and is shown below.
Resource actions are indicated with the following symbols:
+ create
Terraform will perform the following actions:
# aws_eip.nat will be created
+ resource "aws_eip" "nat" {
+ allocation_id = (known after apply)
+ association_id = (known after apply)
+ customer_owned_ip = (known after apply)
+ domain = (known after apply)
+ id = (known after apply)
+ instance = (known after apply)
+ network_border_group = (known after apply)
+ network_interface = (known after apply)
+ private_dns = (known after apply)
+ private_ip = (known after apply)
+ public_dns = (known after apply)
+ public_ip = (known after apply)
+ public_ipv4_pool = (known after apply)
+ vpc = true
}
# aws_iam_instance_profile.ec2_profile will be created
+ resource "aws_iam_instance_profile" "ec2_profile" {
+ arn = (known after apply)
+ create_date = (known after apply)
+ id = (known after apply)
+ name = "ec2_profile"
+ path = "/"
+ role = "ec2_role"
+ unique_id = (known after apply)
}
# aws_iam_role.ec2_role will be created
+ resource "aws_iam_role" "ec2_role" {
+ arn = (known after apply)
+ assume_role_policy = jsonencode(
{
+ Statement = [
+ {
+ Action = "sts:AssumeRole"
+ Effect = "Allow"
+ Principal = {
+ Service = "ec2.amazonaws.com"
}
},
]
+ Version = "2012-10-17"
}
)
+ create_date = (known after apply)
+ force_detach_policies = false
+ id = (known after apply)
+ max_session_duration = 3600
+ name = "ec2_role"
+ path = "/"
+ unique_id = (known after apply)
}
# aws_iam_role_policy.ec2_policy will be created
+ resource "aws_iam_role_policy" "ec2_policy" {
+ id = (known after apply)
+ name = "ec2_policy"
+ policy = jsonencode(
{
+ Statement = [
+ {
+ Action = [
+ "s3:ListStorageLensConfigurations",
+ "s3:ListAllMyBuckets",
+ "s3:ListJobs",
+ "ec2:*",
]
+ Effect = "Allow"
+ Resource = "*"
+ Sid = "Stmt202102171510"
},
+ {
+ Action = [
+ "s3:PutObject",
+ "s3:GetObject",
+ "s3:ListBucketMultipartUploads",
+ "s3:ListBucketVersions",
+ "s3:ListBucket",
+ "s3:ListMultipartUploadParts",
]
+ Effect = "Allow"
+ Resource = [
+ "arn:aws:s3:::terraform-demo-202102171103/*",
+ "arn:aws:s3:::terraform-demo-202102171103/*/*",
]
+ Sid = "Stmt202102171530"
},
]
+ Version = "2012-10-17"
}
)
+ role = (known after apply)
}
# aws_instance.web[0] will be created
+ resource "aws_instance" "web" {
+ ami = "ami-0fc970315c2d38f01"
+ arn = (known after apply)
+ associate_public_ip_address = (known after apply)
+ availability_zone = (known after apply)
+ cpu_core_count = (known after apply)
+ cpu_threads_per_core = (known after apply)
+ get_password_data = false
+ host_id = (known after apply)
+ iam_instance_profile = "ec2_profile"
+ id = (known after apply)
+ instance_state = (known after apply)
+ instance_type = "t3.medium"
+ ipv6_address_count = (known after apply)
+ ipv6_addresses = (known after apply)
+ key_name = (known after apply)
+ outpost_arn = (known after apply)
+ password_data = (known after apply)
+ placement_group = (known after apply)
+ primary_network_interface_id = (known after apply)
+ private_dns = (known after apply)
+ private_ip = (known after apply)
+ public_dns = (known after apply)
+ public_ip = (known after apply)
+ secondary_private_ips = (known after apply)
+ security_groups = (known after apply)
+ source_dest_check = true
+ subnet_id = (known after apply)
+ tags = {
+ "Name" = "appserver"
}
+ tenancy = (known after apply)
+ user_data = "4cf0e018e9af98d1b7ebab63b0c032d4a207b7ef"
+ volume_tags = (known after apply)
+ vpc_security_group_ids = (known after apply)
+ ebs_block_device {
+ delete_on_termination = (known after apply)
+ device_name = (known after apply)
+ encrypted = (known after apply)
+ iops = (known after apply)
+ kms_key_id = (known after apply)
+ snapshot_id = (known after apply)
+ volume_id = (known after apply)
+ volume_size = (known after apply)
+ volume_type = (known after apply)
}
+ ephemeral_block_device {
+ device_name = (known after apply)
+ no_device = (known after apply)
+ virtual_name = (known after apply)
}
+ metadata_options {
+ http_endpoint = (known after apply)
+ http_put_response_hop_limit = (known after apply)
+ http_tokens = (known after apply)
}
+ network_interface {
+ delete_on_termination = (known after apply)
+ device_index = (known after apply)
+ network_interface_id = (known after apply)
}
+ root_block_device {
+ delete_on_termination = (known after apply)
+ device_name = (known after apply)
+ encrypted = (known after apply)
+ iops = (known after apply)
+ kms_key_id = (known after apply)
+ volume_id = (known after apply)
+ volume_size = (known after apply)
+ volume_type = (known after apply)
}
}
# aws_instance.web[1] will be created
+ resource "aws_instance" "web" {
+ ami = "ami-0fc970315c2d38f01"
+ arn = (known after apply)
+ associate_public_ip_address = (known after apply)
+ availability_zone = (known after apply)
+ cpu_core_count = (known after apply)
+ cpu_threads_per_core = (known after apply)
+ get_password_data = false
+ host_id = (known after apply)
+ iam_instance_profile = "ec2_profile"
+ id = (known after apply)
+ instance_state = (known after apply)
+ instance_type = "t3.medium"
+ ipv6_address_count = (known after apply)
+ ipv6_addresses = (known after apply)
+ key_name = (known after apply)
+ outpost_arn = (known after apply)
+ password_data = (known after apply)
+ placement_group = (known after apply)
+ primary_network_interface_id = (known after apply)
+ private_dns = (known after apply)
+ private_ip = (known after apply)
+ public_dns = (known after apply)
+ public_ip = (known after apply)
+ secondary_private_ips = (known after apply)
+ security_groups = (known after apply)
+ source_dest_check = true
+ subnet_id = (known after apply)
+ tags = {
+ "Name" = "appserver"
}
+ tenancy = (known after apply)
+ user_data = "4cf0e018e9af98d1b7ebab63b0c032d4a207b7ef"
+ volume_tags = (known after apply)
+ vpc_security_group_ids = (known after apply)
+ ebs_block_device {
+ delete_on_termination = (known after apply)
+ device_name = (known after apply)
+ encrypted = (known after apply)
+ iops = (known after apply)
+ kms_key_id = (known after apply)
+ snapshot_id = (known after apply)
+ volume_id = (known after apply)
+ volume_size = (known after apply)
+ volume_type = (known after apply)
}
+ ephemeral_block_device {
+ device_name = (known after apply)
+ no_device = (known after apply)
+ virtual_name = (known after apply)
}
+ metadata_options {
+ http_endpoint = (known after apply)
+ http_put_response_hop_limit = (known after apply)
+ http_tokens = (known after apply)
}
+ network_interface {
+ delete_on_termination = (known after apply)
+ device_index = (known after apply)
+ network_interface_id = (known after apply)
}
+ root_block_device {
+ delete_on_termination = (known after apply)
+ device_name = (known after apply)
+ encrypted = (known after apply)
+ iops = (known after apply)
+ kms_key_id = (known after apply)
+ volume_id = (known after apply)
+ volume_size = (known after apply)
+ volume_type = (known after apply)
}
}
# aws_internet_gateway.igw will be created
+ resource "aws_internet_gateway" "igw" {
+ arn = (known after apply)
+ id = (known after apply)
+ owner_id = (known after apply)
+ tags = {
+ "Name" = "mydemo-igw"
}
+ vpc_id = (known after apply)
}
# aws_lb.myapp will be created
+ resource "aws_lb" "myapp" {
+ arn = (known after apply)
+ arn_suffix = (known after apply)
+ dns_name = (known after apply)
+ drop_invalid_header_fields = false
+ enable_deletion_protection = true
+ enable_http2 = true
+ id = (known after apply)
+ idle_timeout = 60
+ internal = false
+ ip_address_type = (known after apply)
+ load_balancer_type = "application"
+ name = "myapp-lb-tf"
+ security_groups = (known after apply)
+ subnets = (known after apply)
+ tags = {
+ "Environment" = "demo"
}
+ vpc_id = (known after apply)
+ zone_id = (known after apply)
+ subnet_mapping {
+ allocation_id = (known after apply)
+ outpost_id = (known after apply)
+ private_ipv4_address = (known after apply)
+ subnet_id = (known after apply)
}
}
# aws_lb_listener.myapp will be created
+ resource "aws_lb_listener" "myapp" {
+ arn = (known after apply)
+ id = (known after apply)
+ load_balancer_arn = (known after apply)
+ port = 80
+ protocol = "HTTP"
+ ssl_policy = (known after apply)
+ default_action {
+ order = (known after apply)
+ target_group_arn = (known after apply)
+ type = "forward"
}
}
# aws_lb_target_group.myapp will be created
+ resource "aws_lb_target_group" "myapp" {
+ arn = (known after apply)
+ arn_suffix = (known after apply)
+ deregistration_delay = 300
+ id = (known after apply)
+ lambda_multi_value_headers_enabled = false
+ load_balancing_algorithm_type = (known after apply)
+ name = "myapp-lb-tg"
+ port = 80
+ protocol = "HTTP"
+ proxy_protocol_v2 = false
+ slow_start = 0
+ target_type = "instance"
+ vpc_id = (known after apply)
+ health_check {
+ enabled = (known after apply)
+ healthy_threshold = (known after apply)
+ interval = (known after apply)
+ matcher = (known after apply)
+ path = (known after apply)
+ port = (known after apply)
+ protocol = (known after apply)
+ timeout = (known after apply)
+ unhealthy_threshold = (known after apply)
}
+ stickiness {
+ cookie_duration = (known after apply)
+ enabled = (known after apply)
+ type = (known after apply)
}
}
# aws_lb_target_group_attachment.myapp[0] will be created
+ resource "aws_lb_target_group_attachment" "myapp" {
+ id = (known after apply)
+ port = 80
+ target_group_arn = (known after apply)
+ target_id = (known after apply)
}
# aws_lb_target_group_attachment.myapp[1] will be created
+ resource "aws_lb_target_group_attachment" "myapp" {
+ id = (known after apply)
+ port = 80
+ target_group_arn = (known after apply)
+ target_id = (known after apply)
}
# aws_nat_gateway.ngw will be created
+ resource "aws_nat_gateway" "ngw" {
+ allocation_id = (known after apply)
+ id = (known after apply)
+ network_interface_id = (known after apply)
+ private_ip = (known after apply)
+ public_ip = (known after apply)
+ subnet_id = (known after apply)
+ tags = {
+ "Name" = "NatGateway"
}
}
# aws_route_table.privatert will be created
+ resource "aws_route_table" "privatert" {
+ id = (known after apply)
+ owner_id = (known after apply)
+ propagating_vgws = (known after apply)
+ route = [
+ {
+ cidr_block = "0.0.0.0/0"
+ egress_only_gateway_id = ""
+ gateway_id = ""
+ instance_id = ""
+ ipv6_cidr_block = ""
+ local_gateway_id = ""
+ nat_gateway_id = (known after apply)
+ network_interface_id = ""
+ transit_gateway_id = ""
+ vpc_endpoint_id = ""
+ vpc_peering_connection_id = ""
},
]
+ tags = {
+ "Name" = "mydemoprivatert"
}
+ vpc_id = (known after apply)
}
# aws_route_table.publicrt will be created
+ resource "aws_route_table" "publicrt" {
+ id = (known after apply)
+ owner_id = (known after apply)
+ propagating_vgws = (known after apply)
+ route = [
+ {
+ cidr_block = "0.0.0.0/0"
+ egress_only_gateway_id = ""
+ gateway_id = (known after apply)
+ instance_id = ""
+ ipv6_cidr_block = ""
+ local_gateway_id = ""
+ nat_gateway_id = ""
+ network_interface_id = ""
+ transit_gateway_id = ""
+ vpc_endpoint_id = ""
+ vpc_peering_connection_id = ""
},
]
+ tags = {
+ "Name" = "mydemopublicrt"
}
+ vpc_id = (known after apply)
}
# aws_route_table_association.private_subnet_association[0] will be created
+ resource "aws_route_table_association" "private_subnet_association" {
+ id = (known after apply)
+ route_table_id = (known after apply)
+ subnet_id = (known after apply)
}
# aws_route_table_association.private_subnet_association[1] will be created
+ resource "aws_route_table_association" "private_subnet_association" {
+ id = (known after apply)
+ route_table_id = (known after apply)
+ subnet_id = (known after apply)
}
# aws_route_table_association.pub_subnet_association[0] will be created
+ resource "aws_route_table_association" "pub_subnet_association" {
+ id = (known after apply)
+ route_table_id = (known after apply)
+ subnet_id = (known after apply)
}
# aws_route_table_association.pub_subnet_association[1] will be created
+ resource "aws_route_table_association" "pub_subnet_association" {
+ id = (known after apply)
+ route_table_id = (known after apply)
+ subnet_id = (known after apply)
}
# aws_s3_bucket.my_bucket will be created
+ resource "aws_s3_bucket" "my_bucket" {
+ acceleration_status = (known after apply)
+ acl = "private"
+ arn = (known after apply)
+ bucket = "terraform-demo-202102171103"
+ bucket_domain_name = (known after apply)
+ bucket_regional_domain_name = (known after apply)
+ force_destroy = false
+ hosted_zone_id = (known after apply)
+ id = (known after apply)
+ region = (known after apply)
+ request_payer = (known after apply)
+ tags = {
+ "Environment" = "demo"
+ "Name" = "My bucket"
}
+ website_domain = (known after apply)
+ website_endpoint = (known after apply)
+ versioning {
+ enabled = (known after apply)
+ mfa_delete = (known after apply)
}
}
# aws_security_group.alb_sg will be created
+ resource "aws_security_group" "alb_sg" {
+ arn = (known after apply)
+ description = "Allow inbound traffic for web applicaiton on ec2"
+ egress = (known after apply)
+ id = (known after apply)
+ ingress = [
+ {
+ cidr_blocks = [
+ "0.0.0.0/0",
]
+ description = "alb web port"
+ from_port = 80
+ ipv6_cidr_blocks = []
+ prefix_list_ids = []
+ protocol = "tcp"
+ security_groups = []
+ self = false
+ to_port = 80
},
]
+ name = "alb_sg"
+ owner_id = (known after apply)
+ revoke_rules_on_delete = false
+ tags = {
+ "Name" = "alb_sg"
}
+ vpc_id = (known after apply)
}
# aws_security_group.ec2_sg will be created
+ resource "aws_security_group" "ec2_sg" {
+ arn = (known after apply)
+ description = "Allow inbound traffic for web applicaiton on ec2"
+ egress = [
+ {
+ cidr_blocks = [
+ "0.0.0.0/0",
]
+ description = ""
+ from_port = 0
+ ipv6_cidr_blocks = []
+ prefix_list_ids = []
+ protocol = "-1"
+ security_groups = []
+ self = false
+ to_port = 0
},
]
+ id = (known after apply)
+ ingress = [
+ {
+ cidr_blocks = [
+ "192.168.50.0/24",
]
+ description = "ssh port"
+ from_port = 22
+ ipv6_cidr_blocks = []
+ prefix_list_ids = []
+ protocol = "tcp"
+ security_groups = []
+ self = false
+ to_port = 22
},
+ {
+ cidr_blocks = [
+ "192.168.50.0/24",
]
+ description = "web port"
+ from_port = 80
+ ipv6_cidr_blocks = []
+ prefix_list_ids = []
+ protocol = "tcp"
+ security_groups = []
+ self = false
+ to_port = 80
},
]
+ name = "ec2_sg"
+ owner_id = (known after apply)
+ revoke_rules_on_delete = false
+ tags = {
+ "Name" = "ec2_sg"
}
+ vpc_id = (known after apply)
}
# aws_subnet.private[0] will be created
+ resource "aws_subnet" "private" {
+ arn = (known after apply)
+ assign_ipv6_address_on_creation = false
+ availability_zone = "eu-west-1a"
+ availability_zone_id = (known after apply)
+ cidr_block = "192.168.50.128/26"
+ id = (known after apply)
+ ipv6_cidr_block_association_id = (known after apply)
+ map_public_ip_on_launch = false
+ owner_id = (known after apply)
+ tags = {
+ "Name" = "PrivateSubnet-1"
}
+ vpc_id = (known after apply)
}
# aws_subnet.private[1] will be created
+ resource "aws_subnet" "private" {
+ arn = (known after apply)
+ assign_ipv6_address_on_creation = false
+ availability_zone = "eu-west-1b"
+ availability_zone_id = (known after apply)
+ cidr_block = "192.168.50.192/26"
+ id = (known after apply)
+ ipv6_cidr_block_association_id = (known after apply)
+ map_public_ip_on_launch = false
+ owner_id = (known after apply)
+ tags = {
+ "Name" = "PrivateSubnet-2"
}
+ vpc_id = (known after apply)
}
# aws_subnet.public[0] will be created
+ resource "aws_subnet" "public" {
+ arn = (known after apply)
+ assign_ipv6_address_on_creation = false
+ availability_zone = "eu-west-1a"
+ availability_zone_id = (known after apply)
+ cidr_block = "192.168.50.0/26"
+ id = (known after apply)
+ ipv6_cidr_block_association_id = (known after apply)
+ map_public_ip_on_launch = true
+ owner_id = (known after apply)
+ tags = {
+ "Name" = "PublicSubnet-1"
}
+ vpc_id = (known after apply)
}
# aws_subnet.public[1] will be created
+ resource "aws_subnet" "public" {
+ arn = (known after apply)
+ assign_ipv6_address_on_creation = false
+ availability_zone = "eu-west-1b"
+ availability_zone_id = (known after apply)
+ cidr_block = "192.168.50.64/26"
+ id = (known after apply)
+ ipv6_cidr_block_association_id = (known after apply)
+ map_public_ip_on_launch = true
+ owner_id = (known after apply)
+ tags = {
+ "Name" = "PublicSubnet-2"
}
+ vpc_id = (known after apply)
}
# aws_vpc.mydemodemo will be created
+ resource "aws_vpc" "mydemodemo" {
+ arn = (known after apply)
+ assign_generated_ipv6_cidr_block = false
+ cidr_block = "192.168.50.0/24"
+ default_network_acl_id = (known after apply)
+ default_route_table_id = (known after apply)
+ default_security_group_id = (known after apply)
+ dhcp_options_id = (known after apply)
+ enable_classiclink = (known after apply)
+ enable_classiclink_dns_support = (known after apply)
+ enable_dns_hostnames = true
+ enable_dns_support = true
+ id = (known after apply)
+ instance_tenancy = "default"
+ ipv6_association_id = (known after apply)
+ ipv6_cidr_block = (known after apply)
+ main_route_table_id = (known after apply)
+ owner_id = (known after apply)
+ tags = {
+ "Environment" = "demo"
+ "Name" = "mydemodemo"
}
}
Plan: 27 to add, 0 to change, 0 to destroy.
Changes to Outputs:
+ nat_gateway_ip = (known after apply)
------------------------------------------------------------------------
Note: You didn't specify an "-out" parameter to save this plan, so Terraform
can't guarantee that exactly these actions will be performed if
"terraform apply" is subsequently run.
If you can see that plan is creating ec2, ec2 roles, ec2 security groups, attaching ec2_role to ec2 instance, creating target groups, alb, listerners. Let us apply terraform
That’s it. if you see that the ec2 and alb’s are created. you can customize the script based on your requirement.
Continuation to the previous article, I’m going to demonstrate how to configure vpc, public subnet, internet gateway, private subnet, NAT Gateway. I’ve modified the scripts to simplify and easy to manage.
I’ve created two terraform workspace as demo so that the terraform will create all resources on demo workspace. This will help us to isolate different environments when you are working on multiple environments such as dev,qa,uat,prod. terraform state files will be created based on the workspace environment.
I’ve used cidrsubent function to create subnets without have to provide them manually. I’ve also used slice and length functions to extract consecutive elements within a list of availability zones and calculate the length to loop through each availability zone to create subnet id’s. For more details, you may refer terraform documentation.
The above terraform file creates, elastic ip address, nat gateway, private subnets, route tables, route table associations.
Please note that i’ve only created two public and two private subnets in this example. If you do want to create subnets for each availability zones then you can modify
count = length(slice(local.az_names)).
Also modify cidr function according to your cidr range. I’m using /24 in this example, if you would like to use larger range /16 cidr then you can modify the function as below
cidrsubnet(var.vpc_cidr, 8, count.index). you can also pass newbits(8) as parameter to generate subnets according to your requirement.
Let us test this and apply.
terraform plan
terraform plan
provider.aws.region
  The region where AWS operations will take place. Examples
  are us-east-1, us-west-2, etc.

  Enter a value: eu-west-1

Refreshing Terraform state in-memory prior to plan...
The refreshed state will be used to calculate this plan, but will not be
persisted to local or remote state storage.

data.aws_availability_zones.azs: Refreshing state...

------------------------------------------------------------------------

An execution plan has been generated and is shown below.
Resource actions are indicated with the following symbols:
  + create

Terraform will perform the following actions:

  # aws_eip.nat will be created
  + resource "aws_eip" "nat" {
      + allocation_id        = (known after apply)
      + association_id       = (known after apply)
      + customer_owned_ip    = (known after apply)
      + domain               = (known after apply)
      + id                   = (known after apply)
      + instance             = (known after apply)
      + network_border_group = (known after apply)
      + network_interface    = (known after apply)
      + private_dns          = (known after apply)
      + private_ip           = (known after apply)
      + public_dns           = (known after apply)
      + public_ip            = (known after apply)
      + public_ipv4_pool     = (known after apply)
      + vpc                  = true
    }

  # aws_internet_gateway.igw will be created
  + resource "aws_internet_gateway" "igw" {
      + arn      = (known after apply)
      + id       = (known after apply)
      + owner_id = (known after apply)
      + tags     = {
          + "Name" = "mydemo-igw"
        }
      + vpc_id   = (known after apply)
    }

  # aws_nat_gateway.ngw will be created
  + resource "aws_nat_gateway" "ngw" {
      + allocation_id        = (known after apply)
      + id                   = (known after apply)
      + network_interface_id = (known after apply)
      + private_ip           = (known after apply)
      + public_ip            = (known after apply)
      + subnet_id            = (known after apply)
      + tags                 = {
          + "Name" = "NatGateway"
        }
    }

  # aws_route_table.privatert will be created
  + resource "aws_route_table" "privatert" {
      + id               = (known after apply)
      + owner_id         = (known after apply)
      + propagating_vgws = (known after apply)
      + route            = [
          + {
              + cidr_block                = "0.0.0.0/0"
              + egress_only_gateway_id    = ""
              + gateway_id                = ""
              + instance_id               = ""
              + ipv6_cidr_block           = ""
              + local_gateway_id          = ""
              + nat_gateway_id            = (known after apply)
              + network_interface_id      = ""
              + transit_gateway_id        = ""
              + vpc_endpoint_id           = ""
              + vpc_peering_connection_id = ""
            },
        ]
      + tags             = {
          + "Name" = "mydemoprivatert"
        }
      + vpc_id           = (known after apply)
    }

  # aws_route_table.publicrt will be created
  + resource "aws_route_table" "publicrt" {
      + id               = (known after apply)
      + owner_id         = (known after apply)
      + propagating_vgws = (known after apply)
      + route            = [
          + {
              + cidr_block                = "0.0.0.0/0"
              + egress_only_gateway_id    = ""
              + gateway_id                = (known after apply)
              + instance_id               = ""
              + ipv6_cidr_block           = ""
              + local_gateway_id          = ""
              + nat_gateway_id            = ""
              + network_interface_id      = ""
              + transit_gateway_id        = ""
              + vpc_endpoint_id           = ""
              + vpc_peering_connection_id = ""
            },
        ]
      + tags             = {
          + "Name" = "mydemopublicrt"
        }
      + vpc_id           = (known after apply)
    }

  # aws_route_table_association.private_subnet_association[0] will be created
  + resource "aws_route_table_association" "private_subnet_association" {
      + id             = (known after apply)
      + route_table_id = (known after apply)
      + subnet_id      = (known after apply)
    }

  # aws_route_table_association.private_subnet_association[1] will be created
  + resource "aws_route_table_association" "private_subnet_association" {
      + id             = (known after apply)
      + route_table_id = (known after apply)
      + subnet_id      = (known after apply)
    }

  # aws_route_table_association.pub_subnet_association[0] will be created
  + resource "aws_route_table_association" "pub_subnet_association" {
      + id             = (known after apply)
      + route_table_id = (known after apply)
      + subnet_id      = (known after apply)
    }

  # aws_route_table_association.pub_subnet_association[1] will be created
  + resource "aws_route_table_association" "pub_subnet_association" {
      + id             = (known after apply)
      + route_table_id = (known after apply)
      + subnet_id      = (known after apply)
    }

  # aws_subnet.private[0] will be created
  + resource "aws_subnet" "private" {
      + arn                             = (known after apply)
      + assign_ipv6_address_on_creation = false
      + availability_zone               = "eu-west-1a"
      + availability_zone_id            = (known after apply)
      + cidr_block                      = "192.168.50.128/26"
      + id                              = (known after apply)
      + ipv6_cidr_block_association_id  = (known after apply)
      + map_public_ip_on_launch         = false
      + owner_id                        = (known after apply)
      + tags                            = {
          + "Name" = "PrivateSubnet-1"
        }
      + vpc_id                          = (known after apply)
    }

  # aws_subnet.private[1] will be created
  + resource "aws_subnet" "private" {
      + arn                             = (known after apply)
      + assign_ipv6_address_on_creation = false
      + availability_zone               = "eu-west-1b"
      + availability_zone_id            = (known after apply)
      + cidr_block                      = "192.168.50.192/26"
      + id                              = (known after apply)
      + ipv6_cidr_block_association_id  = (known after apply)
      + map_public_ip_on_launch         = false
      + owner_id                        = (known after apply)
      + tags                            = {
          + "Name" = "PrivateSubnet-2"
        }
      + vpc_id                          = (known after apply)
    }

  # aws_subnet.public[0] will be created
  + resource "aws_subnet" "public" {
      + arn                             = (known after apply)
      + assign_ipv6_address_on_creation = false
      + availability_zone               = "eu-west-1a"
      + availability_zone_id            = (known after apply)
      + cidr_block                      = "192.168.50.0/26"
      + id                              = (known after apply)
      + ipv6_cidr_block_association_id  = (known after apply)
      + map_public_ip_on_launch         = true
      + owner_id                        = (known after apply)
      + tags                            = {
          + "Name" = "PublicSubnet-1"
        }
      + vpc_id                          = (known after apply)
    }

  # aws_subnet.public[1] will be created
  + resource "aws_subnet" "public" {
      + arn                             = (known after apply)
      + assign_ipv6_address_on_creation = false
      + availability_zone               = "eu-west-1b"
      + availability_zone_id            = (known after apply)
      + cidr_block                      = "192.168.50.64/26"
      + id                              = (known after apply)
      + ipv6_cidr_block_association_id  = (known after apply)
      + map_public_ip_on_launch         = true
      + owner_id                        = (known after apply)
      + tags                            = {
          + "Name" = "PublicSubnet-2"
        }
      + vpc_id                          = (known after apply)
    }

  # aws_vpc.mydemodemo will be created
  + resource "aws_vpc" "mydemodemo" {
      + arn                              = (known after apply)
      + assign_generated_ipv6_cidr_block = false
      + cidr_block                       = "192.168.50.0/24"
      + default_network_acl_id           = (known after apply)
      + default_route_table_id           = (known after apply)
      + default_security_group_id        = (known after apply)
      + dhcp_options_id                  = (known after apply)
      + enable_classiclink               = (known after apply)
      + enable_classiclink_dns_support   = (known after apply)
      + enable_dns_hostnames             = true
      + enable_dns_support               = true
      + id                               = (known after apply)
      + instance_tenancy                 = "default"
      + ipv6_association_id              = (known after apply)
      + ipv6_cidr_block                  = (known after apply)
      + main_route_table_id              = (known after apply)
      + owner_id                         = (known after apply)
      + tags                             = {
          + "Environment" = "demo"
          + "Name"        = "mydemodemo"
        }
    }

Plan: 14 to add, 0 to change, 0 to destroy.

Changes to Outputs:
  + nat_gateway_ip = (known after apply)

------------------------------------------------------------------------

Note: You didn't specify an "-out" parameter to save this plan, so Terraform
can't guarantee that exactly these actions will be performed if
"terraform apply" is subsequently run.
If you look the plan, it creates vpc, internet gateway, route tables, public subnets, elastic ip, nat gateway, private subnets, route table association.
Plan looks good, let us apply.
terraform apply
terraform apply
provider.aws.region
The region where AWS operations will take place. Examples
are us-east-1, us-west-2, etc.
Enter a value: eu-west-1
data.aws_availability_zones.azs: Refreshing state...
An execution plan has been generated and is shown below.
Resource actions are indicated with the following symbols:
+ create
Terraform will perform the following actions:
# aws_eip.nat will be created
+ resource "aws_eip" "nat" {
+ allocation_id = (known after apply)
+ association_id = (known after apply)
+ customer_owned_ip = (known after apply)
+ domain = (known after apply)
+ id = (known after apply)
+ instance = (known after apply)
+ network_border_group = (known after apply)
+ network_interface = (known after apply)
+ private_dns = (known after apply)
+ private_ip = (known after apply)
+ public_dns = (known after apply)
+ public_ip = (known after apply)
+ public_ipv4_pool = (known after apply)
+ vpc = true
}
# aws_internet_gateway.igw will be created
+ resource "aws_internet_gateway" "igw" {
+ arn = (known after apply)
+ id = (known after apply)
+ owner_id = (known after apply)
+ tags = {
+ "Name" = "mydemo-igw"
}
+ vpc_id = (known after apply)
}
# aws_nat_gateway.ngw will be created
+ resource "aws_nat_gateway" "ngw" {
+ allocation_id = (known after apply)
+ id = (known after apply)
+ network_interface_id = (known after apply)
+ private_ip = (known after apply)
+ public_ip = (known after apply)
+ subnet_id = (known after apply)
+ tags = {
+ "Name" = "NatGateway"
}
}
# aws_route_table.privatert will be created
+ resource "aws_route_table" "privatert" {
+ id = (known after apply)
+ owner_id = (known after apply)
+ propagating_vgws = (known after apply)
+ route = [
+ {
+ cidr_block = "0.0.0.0/0"
+ egress_only_gateway_id = ""
+ gateway_id = ""
+ instance_id = ""
+ ipv6_cidr_block = ""
+ local_gateway_id = ""
+ nat_gateway_id = (known after apply)
+ network_interface_id = ""
+ transit_gateway_id = ""
+ vpc_endpoint_id = ""
+ vpc_peering_connection_id = ""
},
]
+ tags = {
+ "Name" = "mydemoprivatert"
}
+ vpc_id = (known after apply)
}
# aws_route_table.publicrt will be created
+ resource "aws_route_table" "publicrt" {
+ id = (known after apply)
+ owner_id = (known after apply)
+ propagating_vgws = (known after apply)
+ route = [
+ {
+ cidr_block = "0.0.0.0/0"
+ egress_only_gateway_id = ""
+ gateway_id = (known after apply)
+ instance_id = ""
+ ipv6_cidr_block = ""
+ local_gateway_id = ""
+ nat_gateway_id = ""
+ network_interface_id = ""
+ transit_gateway_id = ""
+ vpc_endpoint_id = ""
+ vpc_peering_connection_id = ""
},
]
+ tags = {
+ "Name" = "mydemopublicrt"
}
+ vpc_id = (known after apply)
}
# aws_route_table_association.private_subnet_association[0] will be created
+ resource "aws_route_table_association" "private_subnet_association" {
+ id = (known after apply)
+ route_table_id = (known after apply)
+ subnet_id = (known after apply)
}
# aws_route_table_association.private_subnet_association[1] will be created
+ resource "aws_route_table_association" "private_subnet_association" {
+ id = (known after apply)
+ route_table_id = (known after apply)
+ subnet_id = (known after apply)
}
# aws_route_table_association.pub_subnet_association[0] will be created
+ resource "aws_route_table_association" "pub_subnet_association" {
+ id = (known after apply)
+ route_table_id = (known after apply)
+ subnet_id = (known after apply)
}
# aws_route_table_association.pub_subnet_association[1] will be created
+ resource "aws_route_table_association" "pub_subnet_association" {
+ id = (known after apply)
+ route_table_id = (known after apply)
+ subnet_id = (known after apply)
}
# aws_subnet.private[0] will be created
+ resource "aws_subnet" "private" {
+ arn = (known after apply)
+ assign_ipv6_address_on_creation = false
+ availability_zone = "eu-west-1a"
+ availability_zone_id = (known after apply)
+ cidr_block = "192.168.50.128/26"
+ id = (known after apply)
+ ipv6_cidr_block_association_id = (known after apply)
+ map_public_ip_on_launch = false
+ owner_id = (known after apply)
+ tags = {
+ "Name" = "PrivateSubnet-1"
}
+ vpc_id = (known after apply)
}
# aws_subnet.private[1] will be created
+ resource "aws_subnet" "private" {
+ arn = (known after apply)
+ assign_ipv6_address_on_creation = false
+ availability_zone = "eu-west-1b"
+ availability_zone_id = (known after apply)
+ cidr_block = "192.168.50.192/26"
+ id = (known after apply)
+ ipv6_cidr_block_association_id = (known after apply)
+ map_public_ip_on_launch = false
+ owner_id = (known after apply)
+ tags = {
+ "Name" = "PrivateSubnet-2"
}
+ vpc_id = (known after apply)
}
# aws_subnet.public[0] will be created
+ resource "aws_subnet" "public" {
+ arn = (known after apply)
+ assign_ipv6_address_on_creation = false
+ availability_zone = "eu-west-1a"
+ availability_zone_id = (known after apply)
+ cidr_block = "192.168.50.0/26"
+ id = (known after apply)
+ ipv6_cidr_block_association_id = (known after apply)
+ map_public_ip_on_launch = true
+ owner_id = (known after apply)
+ tags = {
+ "Name" = "PublicSubnet-1"
}
+ vpc_id = (known after apply)
}
# aws_subnet.public[1] will be created
+ resource "aws_subnet" "public" {
+ arn = (known after apply)
+ assign_ipv6_address_on_creation = false
+ availability_zone = "eu-west-1b"
+ availability_zone_id = (known after apply)
+ cidr_block = "192.168.50.64/26"
+ id = (known after apply)
+ ipv6_cidr_block_association_id = (known after apply)
+ map_public_ip_on_launch = true
+ owner_id = (known after apply)
+ tags = {
+ "Name" = "PublicSubnet-2"
}
+ vpc_id = (known after apply)
}
# aws_vpc.mydemodemo will be created
+ resource "aws_vpc" "mydemodemo" {
+ arn = (known after apply)
+ assign_generated_ipv6_cidr_block = false
+ cidr_block = "192.168.50.0/24"
+ default_network_acl_id = (known after apply)
+ default_route_table_id = (known after apply)
+ default_security_group_id = (known after apply)
+ dhcp_options_id = (known after apply)
+ enable_classiclink = (known after apply)
+ enable_classiclink_dns_support = (known after apply)
+ enable_dns_hostnames = true
+ enable_dns_support = true
+ id = (known after apply)
+ instance_tenancy = "default"
+ ipv6_association_id = (known after apply)
+ ipv6_cidr_block = (known after apply)
+ main_route_table_id = (known after apply)
+ owner_id = (known after apply)
+ tags = {
+ "Environment" = "demo"
+ "Name" = "mydemodemo"
}
}
Plan: 14 to add, 0 to change, 0 to destroy.
Changes to Outputs:
+ nat_gateway_ip = (known after apply)
Do you want to perform these actions in workspace "demo"?
Terraform will perform the actions described above.
Only 'yes' will be accepted to approve.
Enter a value: yes
aws_eip.nat: Creating...
aws_vpc.mydemodemo: Creating...
aws_eip.nat: Creation complete after 0s [id=eipalloc-0575af76798f68266]
aws_vpc.mydemodemo: Creation complete after 1s [id=vpc-0d96547a55dd596f6]
aws_subnet.public[1]: Creating...
aws_subnet.private[0]: Creating...
aws_internet_gateway.igw: Creating...
aws_subnet.private[1]: Creating...
aws_subnet.public[0]: Creating...
aws_internet_gateway.igw: Creation complete after 1s [id=igw-06d576b66aec53673]
aws_route_table.publicrt: Creating...
aws_subnet.private[1]: Creation complete after 1s [id=subnet-0ab88aee1b33b8483]
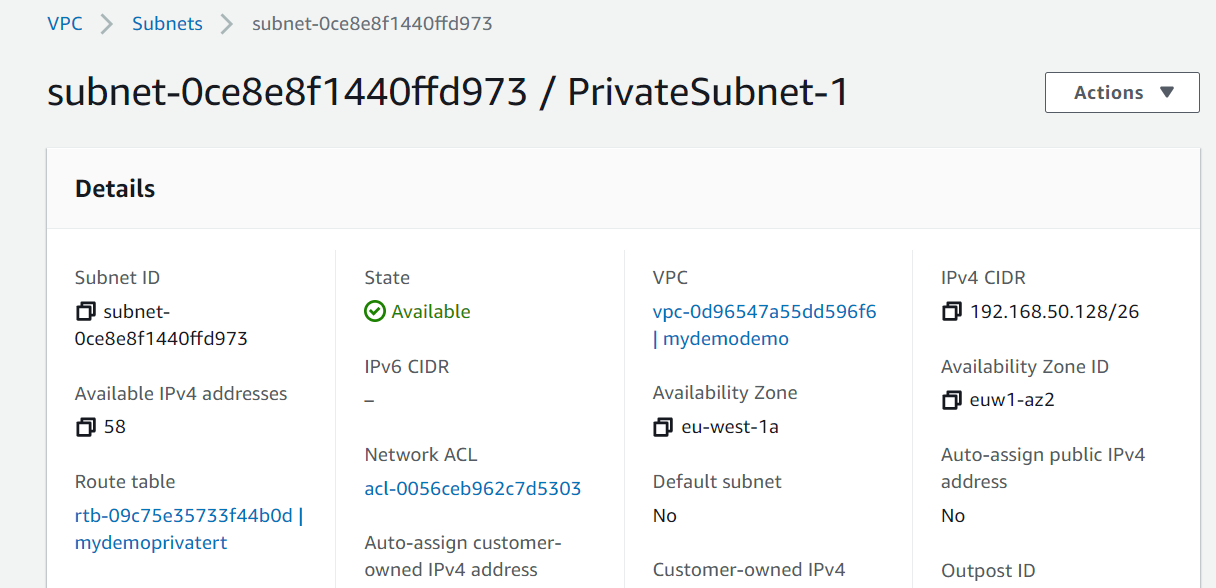
aws_subnet.private[0]: Creation complete after 1s [id=subnet-0ce8e8f1440ffd973]
aws_nat_gateway.ngw: Creating...
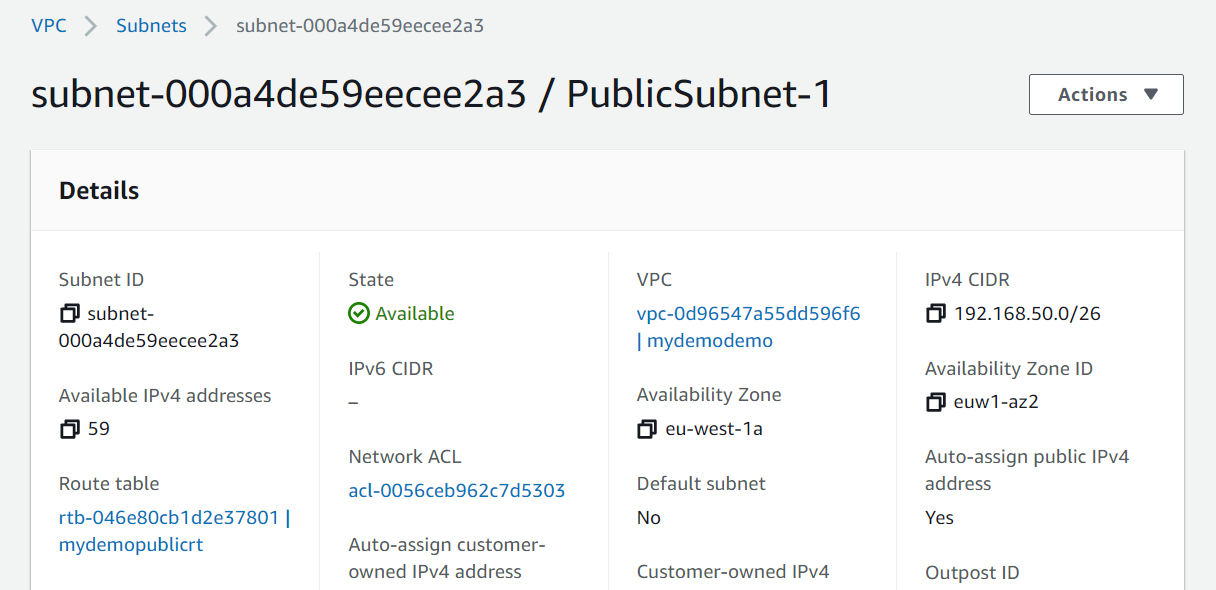
aws_subnet.public[0]: Creation complete after 1s [id=subnet-000a4de59eecee2a3]
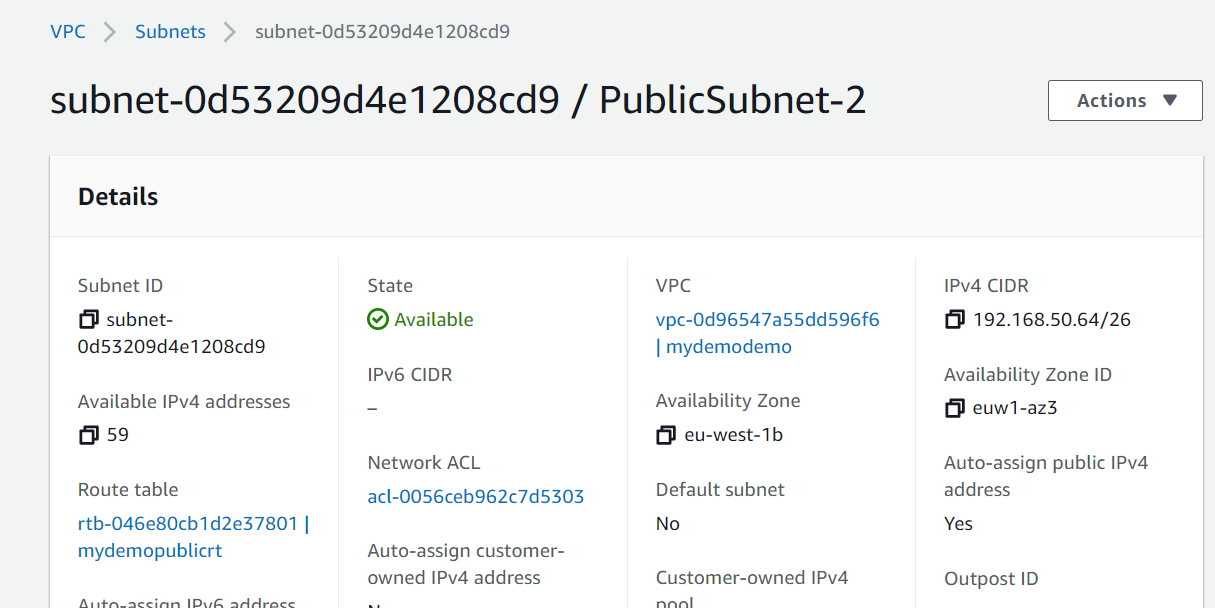
aws_subnet.public[1]: Creation complete after 1s [id=subnet-0d53209d4e1208cd9]
aws_route_table.publicrt: Creation complete after 0s [id=rtb-046e80cb1d2e37801]
aws_route_table_association.pub_subnet_association[1]: Creating...
aws_route_table_association.pub_subnet_association[0]: Creating...
aws_route_table_association.pub_subnet_association[0]: Creation complete after 0s [id=rtbassoc-0eb5f538c92bf0a9b]
aws_route_table_association.pub_subnet_association[1]: Creation complete after 0s [id=rtbassoc-088d81f0ac032d6db]
aws_nat_gateway.ngw: Still creating... [10s elapsed]
aws_nat_gateway.ngw: Still creating... [20s elapsed]
aws_nat_gateway.ngw: Still creating... [30s elapsed]
aws_nat_gateway.ngw: Still creating... [40s elapsed]
aws_nat_gateway.ngw: Still creating... [50s elapsed]
aws_nat_gateway.ngw: Still creating... [1m0s elapsed]
aws_nat_gateway.ngw: Still creating... [1m10s elapsed]
aws_nat_gateway.ngw: Still creating... [1m20s elapsed]
aws_nat_gateway.ngw: Still creating... [1m30s elapsed]
aws_nat_gateway.ngw: Still creating... [1m40s elapsed]
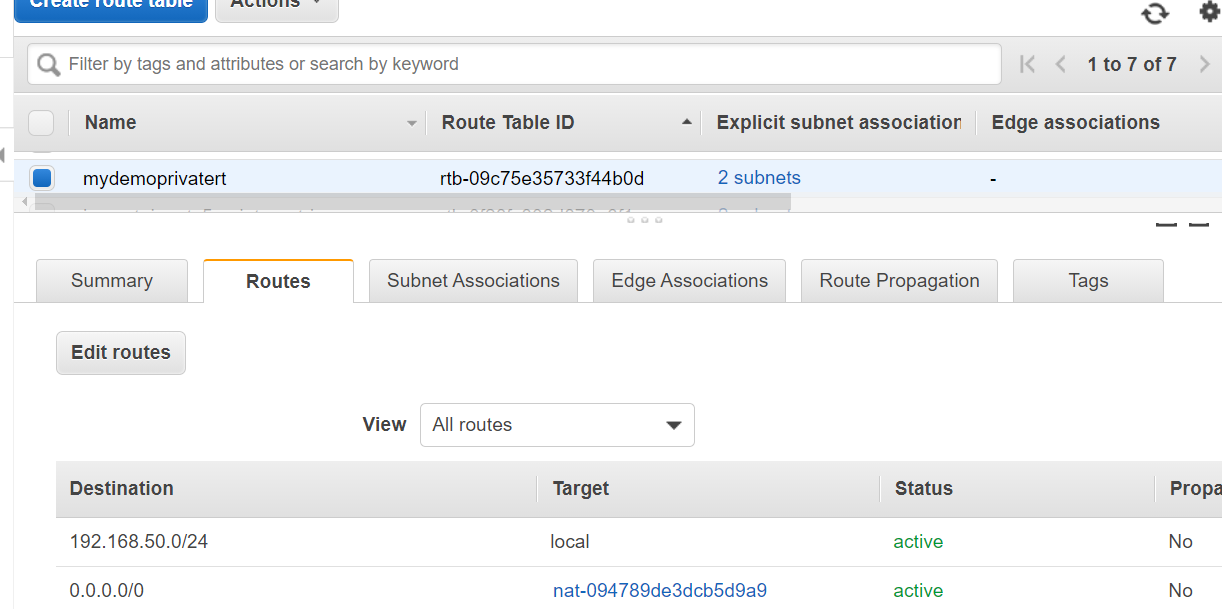
aws_nat_gateway.ngw: Creation complete after 1m44s [id=nat-094789de3dcb5d9a9]
aws_route_table.privatert: Creating...
aws_route_table.privatert: Creation complete after 0s [id=rtb-09c75e35733f44b0d]
aws_route_table_association.private_subnet_association[1]: Creating...
aws_route_table_association.private_subnet_association[0]: Creating...
aws_route_table_association.private_subnet_association[1]: Creation complete after 1s [id=rtbassoc-0d97f7027cdf93594]
aws_route_table_association.private_subnet_association[0]: Creation complete after 1s [id=rtbassoc-00dd10f8578438faa]
Apply complete! Resources: 14 added, 0 changed, 0 destroyed.
Outputs:
nat_gateway_ip = xx.xx.xxx.xxx
That’s it. Stay tuned for more updates on this series (Terraform, Ansible, AWS CDK)
I used element function to get the list of availability zones and create them respectively. For more details about element function you may refer here
Now, let’s run terraform plan
terraform plan
Refreshing Terraform state in-memory prior to plan…
The refreshed state will be used to calculate this plan, but will not be
persisted to local or remote state storage.
data.aws_availability_zones.AZs: Refreshing state…
An execution plan has been generated and is shown below.
Resource actions are indicated with the following symbols:
create
Terraform will perform the following actions:
# aws_internet_gateway.mydemodemo-igw will be created
resource "aws_internet_gateway" "mydemodemo-igw" {
arn = (known after apply)
id = (known after apply)
owner_id = (known after apply)
vpc_id = (known after apply)
}
aws_subnet.mydemodemo-private-a will be created
resource "aws_subnet" "mydemodemo-private-a" {
arn = (known after apply)
assign_ipv6_address_on_creation = false
availability_zone = "eu-west-1c"
availability_zone_id = (known after apply)
cidr_block = "192.168.50.64/26"
id = (known after apply)
ipv6_cidr_block_association_id = (known after apply)
map_public_ip_on_launch = false
owner_id = (known after apply)
tags = { "Name" = "mydemodemo-private-a"
}
vpc_id = (known after apply)
}
aws_subnet.mydemodemo-private-b will be created
resource "aws_subnet" "mydemodemo-private-b" {
arn = (known after apply)
assign_ipv6_address_on_creation = false
availability_zone = "eu-west-1a"
availability_zone_id = (known after apply)
cidr_block = "192.168.50.192/26"
id = (known after apply)
ipv6_cidr_block_association_id = (known after apply)
map_public_ip_on_launch = false
owner_id = (known after apply)
tags = { "Name" = "mydemodemo-private-b"
}
vpc_id = (known after apply)
}
aws_subnet.mydemodemo-public-a will be created
resource "aws_subnet" "mydemodemo-public-a" {
arn = (known after apply)
assign_ipv6_address_on_creation = false
availability_zone = "eu-west-1a"
availability_zone_id = (known after apply)
cidr_block = "192.168.50.0/26"
id = (known after apply)
ipv6_cidr_block_association_id = (known after apply)
map_public_ip_on_launch = false
owner_id = (known after apply)
tags = { "Name" = "mydemodemo-public-a"
}
vpc_id = (known after apply)
}
aws_subnet.mydemodemo-public-b will be created
resource "aws_subnet" "mydemodemo-public-b" {
arn = (known after apply)
assign_ipv6_address_on_creation = false
availability_zone = "eu-west-1b"
availability_zone_id = (known after apply)
cidr_block = "192.168.50.128/26"
id = (known after apply)
ipv6_cidr_block_association_id = (known after apply)
map_public_ip_on_launch = false
owner_id = (known after apply)
tags = { "Name" = "mydemodemo-public-b"
}
vpc_id = (known after apply)
}
aws_vpc.mydemodemo will be created
resource "aws_vpc" "mydemodemo" {
arn = (known after apply)
assign_generated_ipv6_cidr_block = false
cidr_block = "192.168.50.0/24"
default_network_acl_id = (known after apply)
default_route_table_id = (known after apply)
default_security_group_id = (known after apply)
dhcp_options_id = (known after apply)
enable_classiclink = (known after apply)
enable_classiclink_dns_support = (known after apply)
enable_dns_hostnames = true
enable_dns_support = true
id = (known after apply)
instance_tenancy = "default"
ipv6_association_id = (known after apply)
ipv6_cidr_block = (known after apply)
main_route_table_id = (known after apply)
owner_id = (known after apply)
tags = { "Name" = "mydemodemo"
}
}
Plan: 6 to add, 0 to change, 0 to destroy.
Note: You didn't specify an "-out" parameter to save this plan, so Terraform
can't guarantee that exactly these actions will be performed if
"terraform apply" is subsequently run.
Terraform plan looks good. you can see that the resources are going to be created without any errors.
Here is the full network.tf file
Create VPC
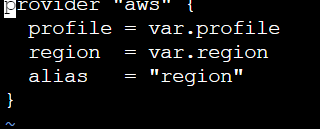
 resource "aws_vpc" "mydemodemo" {
   provider             = aws.region
   cidr_block           = "192.168.50.0/24"
   instance_tenancy     = "default"
   enable_dns_support   = true
   enable_dns_hostnames = true
   tags = {
     Name = "mydemodemo"
   }
 }
Create internet gateways
 resource "aws_internet_gateway" "mydemodemo-igw" {
   provider = aws.region
   vpc_id   = aws_vpc.mydemodemo.id
 }
Get all Availability Zones in the current vpc mydemodemo
 data "aws_availability_zones" "AZs" {
   provider = aws.region
   state    = "available"
 }
Create public subnet # 1 in eu-west-1 region
 resource "aws_subnet" "mydemodemo-public-a" {
   provider          = aws.region
   availability_zone = element(data.aws_availability_zones.AZs.names, 0)
   vpc_id            = aws_vpc.mydemodemo.id
   cidr_block        = "192.168.50.0/26"
   tags = {
     Name = "mydemodemo-public-a"
                }
 }
Create public subnet # 2 in eu-west-1 region
resource "aws_subnet" "mydemodemo-public-b" {
provider = aws.region
availability_zone = element(data.aws_availability_zones.AZs.names, 1)
vpc_id = aws_vpc.mydemodemo.id
cidr_block = "192.168.50.128/26"
tags = {
Name = "mydemodemo-public-b"
}
}
Create private subnet #1 in eu-west-1 region
 resource "aws_subnet" "mydemodemo-private-a" {
   provider          = aws.region
   availability_zone = element(data.aws_availability_zones.AZs.names, 2)
   vpc_id            = aws_vpc.mydemodemo.id
   cidr_block        = "192.168.50.64/26"
   tags = {
     Name = "mydemodemo-private-a"
   }
 }
resource "aws_subnet" "mydemodemo-private-b" {
   provider          = aws.region
   availability_zone = element(data.aws_availability_zones.AZs.names, 3)
   vpc_id            = aws_vpc.mydemodemo.id
   cidr_block        = "192.168.50.192/26"
   tags = {
     Name = "mydemodemo-private-b"
   }
 }
Let us apply network.tf
terraform apply
terraform apply
 data.aws_availability_zones.AZs: Refreshing state…
 An execution plan has been generated and is shown below.
 Resource actions are indicated with the following symbols:
 create
 Terraform will perform the following actions:
 # aws_internet_gateway.mydemodemo-igw will be created
 resource "aws_internet_gateway" "mydemodemo-igw" {
 arn      = (known after apply)
 id       = (known after apply)
 owner_id = (known after apply)
 vpc_id   = (known after apply)
 }
 aws_subnet.mydemodemo-private-a will be created
 resource "aws_subnet" "mydemodemo-private-a" {
 arn                             = (known after apply)
 assign_ipv6_address_on_creation = false
 availability_zone               = "eu-west-1c"
 availability_zone_id            = (known after apply)
 cidr_block                      = "192.168.50.64/26"
 id                              = (known after apply)
 ipv6_cidr_block_association_id  = (known after apply)
 map_public_ip_on_launch         = false
 owner_id                        = (known after apply)
 tags                            = { "Name" = "mydemodemo-private-a"
 }
 vpc_id                          = (known after apply)
 }
 aws_subnet.mydemodemo-private-b will be created
 resource "aws_subnet" "mydemodemo-private-b" {
 arn                             = (known after apply)
 assign_ipv6_address_on_creation = false
 availability_zone               = "eu-west-1a"
 availability_zone_id            = (known after apply)
 cidr_block                      = "192.168.50.192/26"
 id                              = (known after apply)
 ipv6_cidr_block_association_id  = (known after apply)
 map_public_ip_on_launch         = false
 owner_id                        = (known after apply)
 tags                            = { "Name" = "mydemodemo-private-b"
 }
 vpc_id                          = (known after apply)
 }
 aws_subnet.mydemodemo-public-a will be created
 resource "aws_subnet" "mydemodemo-public-a" {
 arn                             = (known after apply)
 assign_ipv6_address_on_creation = false
 availability_zone               = "eu-west-1a"
 availability_zone_id            = (known after apply)
 cidr_block                      = "192.168.50.0/26"
 id                              = (known after apply)
 ipv6_cidr_block_association_id  = (known after apply)
 map_public_ip_on_launch         = false
 owner_id                        = (known after apply)
 tags                            = { "Name" = "mydemodemo-public-a"
 }
 vpc_id                          = (known after apply)
 }
 aws_subnet.mydemodemo-public-b will be created
 resource "aws_subnet" "mydemodemo-public-b" {
 arn                             = (known after apply)
 assign_ipv6_address_on_creation = false
 availability_zone               = "eu-west-1b"
 availability_zone_id            = (known after apply)
 cidr_block                      = "192.168.50.128/26"
 id                              = (known after apply)
 ipv6_cidr_block_association_id  = (known after apply)
 map_public_ip_on_launch         = false
 owner_id                        = (known after apply)
 tags                            = { "Name" = "mydemodemo-public-b"
 }
 vpc_id                          = (known after apply)
 }
 aws_vpc.mydemodemo will be created
 resource "aws_vpc" "mydemodemo" {
 arn                              = (known after apply)
 assign_generated_ipv6_cidr_block = false
 cidr_block                       = "192.168.50.0/24"
 default_network_acl_id           = (known after apply)
 default_route_table_id           = (known after apply)
 default_security_group_id        = (known after apply)
 dhcp_options_id                  = (known after apply)
 enable_classiclink               = (known after apply)
 enable_classiclink_dns_support   = (known after apply)
 enable_dns_hostnames             = true
 enable_dns_support               = true
 id                               = (known after apply)
 instance_tenancy                 = "default"
 ipv6_association_id              = (known after apply)
 ipv6_cidr_block                  = (known after apply)
 main_route_table_id              = (known after apply)
 owner_id                         = (known after apply)
 tags                             = { "Name" = "mydemodemo"
 }
 }
 Plan: 6 to add, 0 to change, 0 to destroy.
 Do you want to perform these actions?
   Terraform will perform the actions described above.
   Only 'yes' will be accepted to approve.
 Enter a value: yes
 aws_vpc.mydemodemo: Creating…
 aws_vpc.mydemodemo: Creation complete after 1s [id=vpc-00566cc74b0162d72]
 aws_subnet.mydemodemo-public-b: Creating…
 aws_subnet.mydemodemo-private-b: Creating…
 aws_subnet.mydemodemo-private-a: Creating…
 aws_internet_gateway.mydemodemo-igw: Creating…
 aws_subnet.mydemodemo-public-a: Creating…
 aws_internet_gateway.mydemodemo-igw: Creation complete after 0s [id=igw-054372249d1864798]
 aws_subnet.mydemodemo-private-b: Creation complete after 0s [id=subnet-0148fb04d52e33bca]
 aws_subnet.mydemodemo-public-b: Creation complete after 0s [id=subnet-0392daa47a4dfec77]
 aws_subnet.mydemodemo-private-a: Creation complete after 0s [id=subnet-0a2c8222c5acfc2c0]
 aws_subnet.mydemodemo-public-a: Creation complete after 0s [id=subnet-014010a55e3cb336a]
 Apply complete! Resources: 6 added, 0 changed, 0 destroyed.
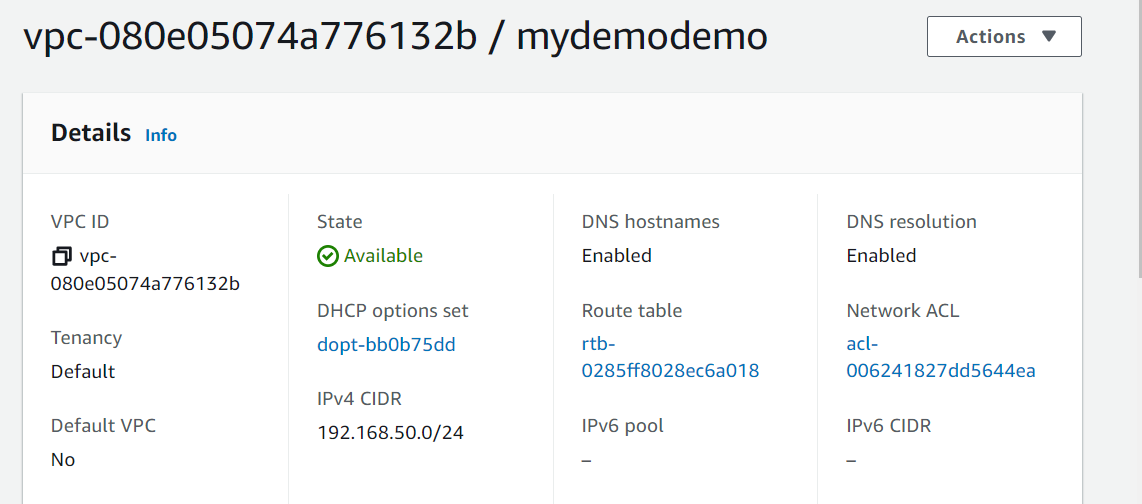
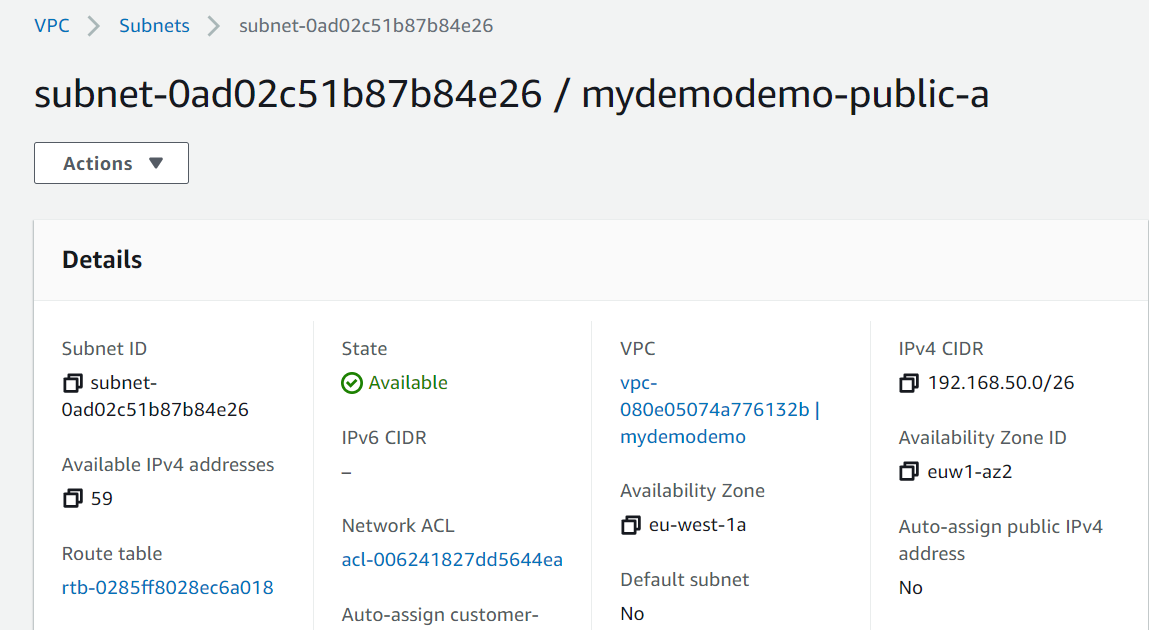
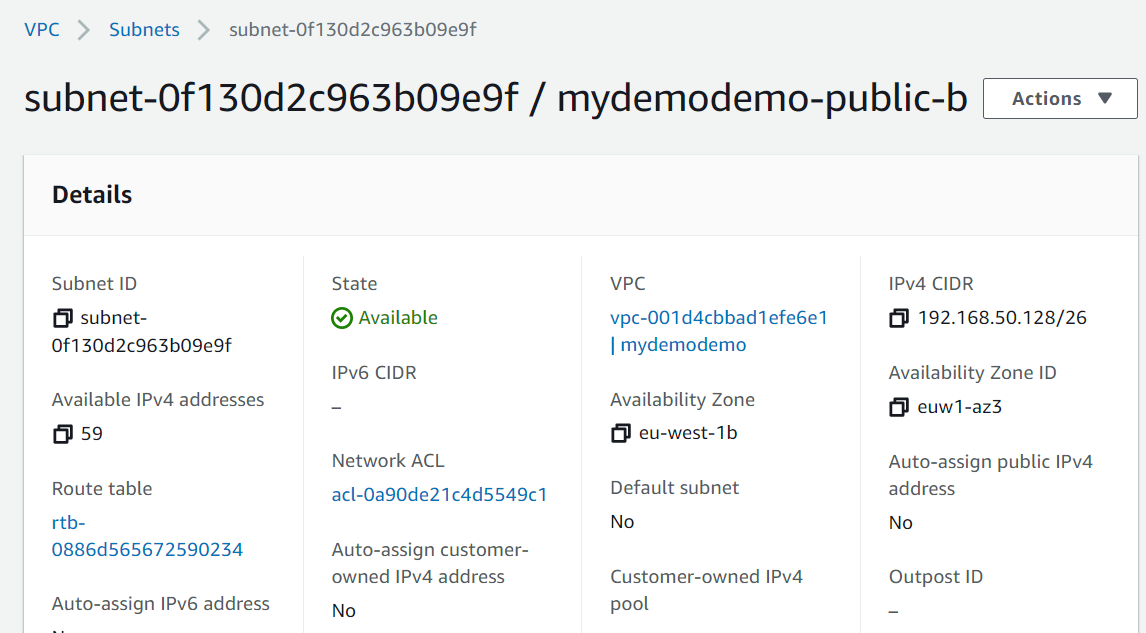
You can see that 6 resources are created. Wait for few minutes to see them appear on aws console.
Here it is, I can see that vpc, network, internet gateway are created.
That’s it. you can see that we have created network (VPC, subnets, Internet gateway). I will be creating EC2, RDS in the upcoming articles. Stay tuned.
In this blog post, I would like to present how to create terraform state file as s3. I will be writing series of blog posts about terraform, ansible automation, How to use AWS CDK to automate infrastructure.
To begin with, Let us start about how to configure terraform state file as Amazon S3.
Before you configure terraform state, you need to make sure terraform install. For more details about how to install terraform you may refer here
Create s3 bucket (You can do this by using aws console or aws cli)
I’ve used eu-west-1 region for creating bucket if you are using default region us-east-1 then you do not need to mention region, Locationconstraint.