
In this blog post, i would like to present how to create Jupyter Notebook and run various commands using Amazon Sagemaker
What is Jupyter Notebook?
The Jupyter Notebook is an open-source web application that allows you to create and share documents that contain live code, equations, visualizations and narrative text. Uses include: data cleaning and transformation, numerical simulation, statistical modeling, data visualization, machine learning, and much more. For more information you may refer here.
What is Amazon Sagemaker?
Amazon SageMaker is a fully-managed service that enables data scientists and developers to quickly and easily build, train, and deploy machine learning models at any scale. Amazon SageMaker includes modules that can be used together or independently to build, train, and deploy your machine learning models. For more information you may refer here.
Let’s create a jupyter notebook using sagemaker
Step1: Open Amazon Sagemaker

Step2: Click on Create notebook instance

Step3: Create a notebook instance name “MyJupyterNotebook”
If you want speed up the throughput and decrease the latency of getting real-time inferences from your deep learning models that are deployed a as Amazon sagemaker hosted models you can select elastic inference. In this example, i’m leaving this none.
You will have to create an IAM role upon instance creation or use existing IAM role arn which has enough permissions to create jupyter notebook instance
You can select the sagemaker to be deployed on dedicated vpc so that the instance can be created in private subnet for internal access. In this example i’m leaving this option as none so that i can access over the internet.
You can configure life cycle configuration to run shell scrips upon instance creation.
You can specify the volume size of the instance. This depends on howmuch you want to store the data on notebook. I leave it as default.
You can select git repository while sagemaker notebook is being created, so that the jupyter will start in the specified repository. If you would like to encrypt the instance you can use AWS KMS.
Tags: You can specify name of the notebook and the purpose for easy identification.
Click on create notebook instance, this will create jupyter notebook instance as below.

This will take few minutes to create instance depending on the size of the instance we chose.

As you can see the instance was created successfully, let’s open the jupyter notebook by clicking Open Jupyter under Actions tab.

There you go, you are successfully created Jupyter notebook.
Let’s run some commands on the notebook.
Click on New at the top right corner and then you will see many different modules to run the commands. I will select python3.
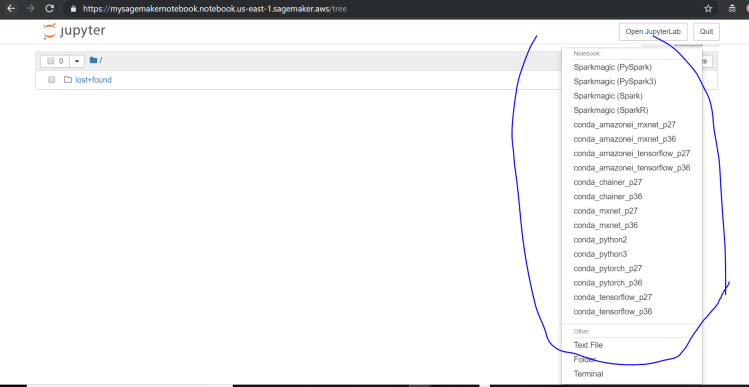
After you select conda_python3, this will open in new window as below

I’ve created one s3 bucket called “testrama2019” and i will be copying the content in s3 to local jupyter notebook. I will be using aws cli terminal commands. When you use terminal commands you need to specify “!” before the command.

Let’s execute by clicking Run or you can use shift+enter to run the command

If you look at the results, i’ve a sample csv file which i will be reading after importing pandas module

That’s it. If you look at the above i was able to read the content in csv file using pandas module.
Hope you enjoyed the post.
Cheers
Ramasankar Molleti
